Workspace Settings
Edit workspace details and find your settings
Step-by-step guide
The same walkthrough in writing, with a screenshot for every step.
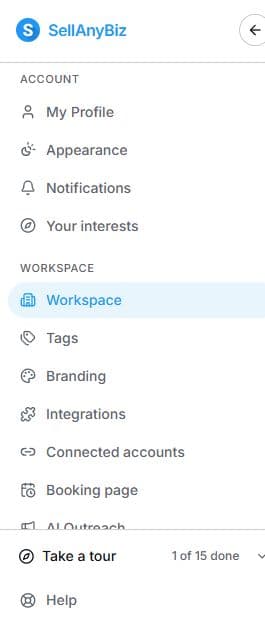
1. Open Workspace settings
Choose the workspace name in the dashboard header, then Workspace in the settings sidebar. Personal profile settings are under Account. Workspace tools and Plan & legal have their own sections.
2. Edit the workspace profile
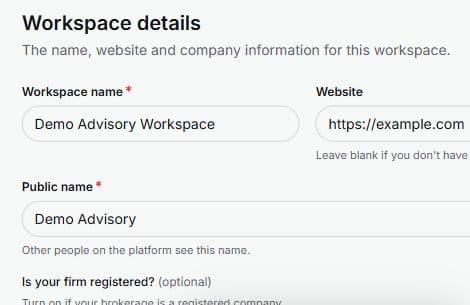
Select Edit in Workspace details. Review Workspace name, Website and Public name. The public name is visible to other platform users. Registration details are required when the registered-company option is enabled. The captured values are fictional and were not saved.
3. Review, save or cancel
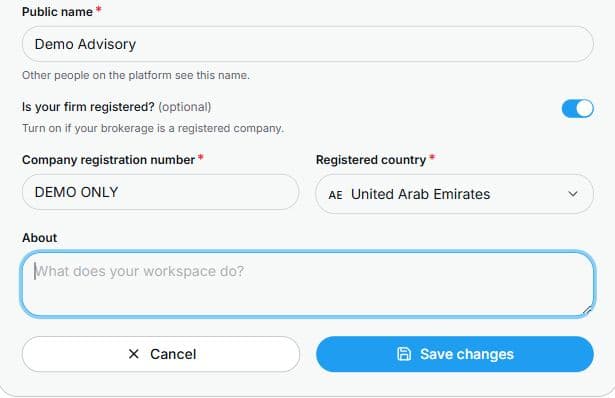
Review the About field and choose Save changes, or Cancel to discard the draft. This demonstration cancels. Use Integrations for personal tool connections in the workspace and Connected accounts for workspace communication channels. Find Members on the Workspace page; permissions govern the actions you can perform.
Common questions
Short answers to what people ask most about this part of the product.
What is the public name?
It is the workspace name other people on the platform see. Review it before saving.
Did this tutorial change a real workspace?
No. The demonstration entered fictional values in an unsaved form and selected Cancel.
Why can’t I edit or invite members?
Your workspace role and permissions control available actions. Ask your workspace owner or administrator to review your access.
Video transcript
Open your workspace name in the dashboard header to reach Workspace settings. The sidebar separates your personal account, workspace tools, and plan and legal settings. Choose Workspace for company details and members. Check that you are in the correct workspace before making changes. In Workspace details, select Edit. Update the workspace name, website and public name. The public name is what other people on the platform see. This recording uses a fictional demo name and an example website. Registration information is conditional on the registered company switch. Complete only the details that apply to your business. Add a short About description, review the form, and choose Save changes when ready. Cancel discards an unfinished edit; that is what we do in this demonstration. Use the settings sidebar to find Branding, Tags, Booking page and your connections. Integrations connect your tools in a workspace, while Connected accounts manages workspace communication channels. Team and access changes belong in the Members section and should match each person's role.
Watch the video, or follow the written steps below. Both cover the same walkthrough.