Use Case 46
Share lease and property documents
Available steps and preparation
This video explains the controls available today and how to prepare. Some actions depend on permissions, approval or tools that are still coming soon; the guide identifies these steps.
Browse use cases for Commercial propertyStep-by-step guide
The same walkthrough in writing, with a screenshot for every step.
Preparation guide: the related platform tools are shown; this does not demonstrate a completed dedicated workflow. Check the limitations below.
1. Find the correct room
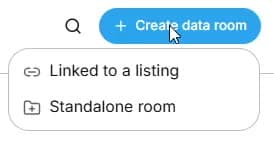
Preparation only. Use the correct existing listing room or inspect Create data room → Standalone room. New business listings prepare linked rooms automatically.
2. Check document version and visibility
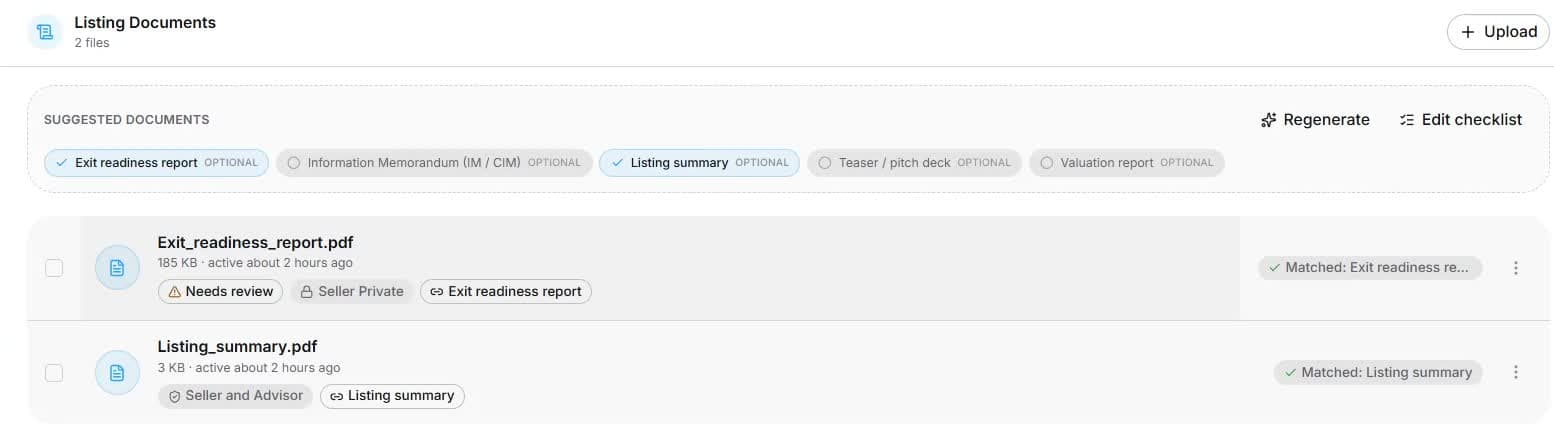
Open Documents and inspect category, review status, version and visibility. Organisers review upload classification; readers see only permitted files. Captured records are fictional.
3. Understand organiser access controls
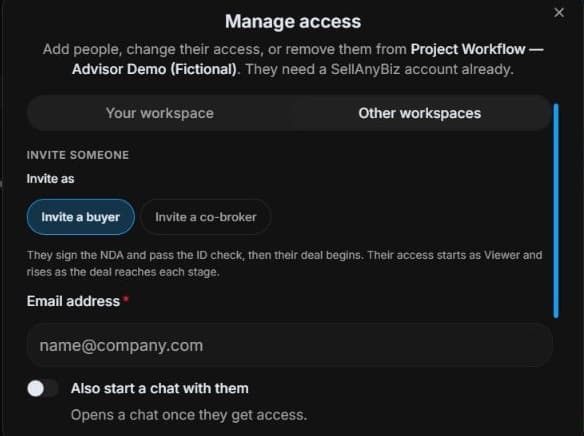
Organiser view: inspect Manage access → Invite buyer / Invite co-broker. Review side, NDA, identity and approval requirements. Reader access does not grant this panel. No invitation or approval is performed.
4. Review the outcome and next step
Separate signed leases from draft terms, check dates and permitted recipients, then review visibility before inviting. The room controls files; it certifies neither title, rent collection nor planning permissions. Use appropriate professional checks for those facts. Your practical result is a correct evidence pack and controlled review, with actual property decisions kept in their separate authorised process.
Common questions
Short answers to what people ask most about this part of the product.
Does storing a title verify ownership?
No. The room stores evidence and controls visibility. Professional title, lease and permission checks remain separate.
Which lease version should I share?
Use the reviewed authorised version and label drafts clearly. Check dates, tenant-information restrictions and visibility before recipient access; storage is not legal certification.
Why are the shown controls in English?
These real platform captures use English labels. Italian narration and instructions retain them so you can identify the exact shown controls.
Video transcript
You need controlled review of leases, floor plans and rent schedules. This is preparation only: property editing is disabled, so the example uses a general room rather than a specialised property transaction. Confirm the correct property, record version and authority to share before preparing upload or recipient access, especially for tenant or ownership information. In Documents, inspect file name, category, review status and visibility. These files belong to a fictional training room. A generated report is a summary to review, not a replacement for original accounts or signed contracts. Organisers can upload authorised evidence and inspect its classification. Readers should open only the files actually permitted for their role and verify current reporting periods before relying on them. The organiser’s Manage access panel separates workspace access from external buyer and co-broker invitations. Check the intended person and side before changes. An invitation is not unrestricted access: NDA, identity and approval requirements can still apply. Viewing a document does not give a reader these organiser controls. Separate signed leases from draft terms, check dates and permitted recipients, then review visibility before inviting. The room controls files; it certifies neither title, rent collection nor planning permissions. Use appropriate professional checks for those facts. Your practical result is a correct evidence pack and controlled review, with actual property decisions kept in their separate authorised process.
Watch the video, or follow the written steps below. Both cover the same walkthrough.
Next guide